
In this tutorial, you will learn how to utilize Tesseract to detect, localize, and OCR text, all within a single, efficient function call.
Back in September, I showed you how to use OpenCV to detect and OCR text. This method was a three stage process:
- Use OpenCV’s EAST text detection model to detect the presence of text in an image
- Extract the text Region of Interest (ROI) from the image using basic image cropping/NumPy array slicing
- Take the text ROI, and then pass it into Tesseract to actually OCR the text
Our method worked quite well but was a bit complicated and less efficient due to the multistage process.
PyImageSearch reader Bryan wonders if there is a better, more streamlined way:
Hi Adrian,
I noticed that OpenCV’s uses the EAST text detection model. I assume text detection also exists inside Tesseract?
If so, is there anyway we can utilize Tesseract to both detect the text and OCR it without having to call additional OpenCV functions?
You’re in luck, Bryan. Tesseract does have the ability to perform text detection and OCR in a single function call — and as you’ll find out, it’s quite easy to do!
To learn how to detect, localize, and OCR text with Tesseract, just keep reading.
Tesseract OCR: Text localization and detection
In the first part of this tutorial, we’ll discuss the concept of text detection and localization.
From there, I will show you how to install Tesseract on your system.
We’ll then implement text localization, detection, and OCR using Tesseract and Python.
Finally, we’ll review our results.
What is text localization and detection?
Text detection is the process of localizing where an image text is.
You can think of text detection as a specialized form of object detection.
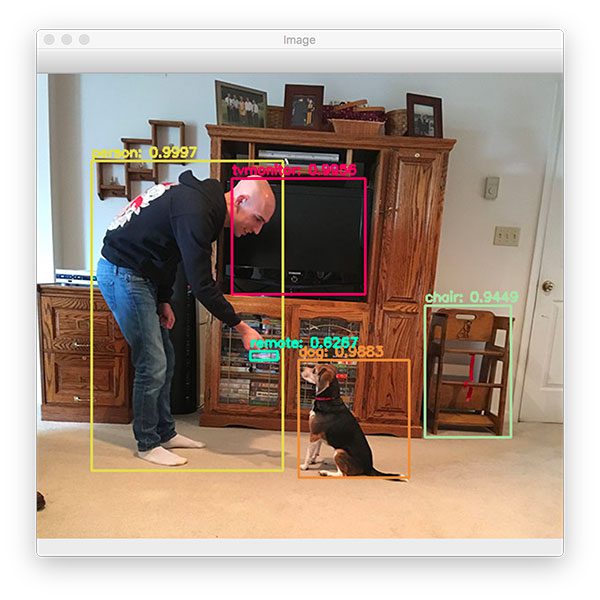
In object detection, our goal is to (1) detect and compute the bounding box of all objects in an image and (2) determine the class label for each bounding box, similar to the image below:
In text detection, our goal is to automatically compute the bounding boxes for every region of text in an image:

Once we have those regions, we can then OCR them.
How to install pytesseract for Tesseract OCR
I have provided instructions for installing the Tesseract OCR engine as well as pytesseract (the Python bindings used to interface with Tesseract) in my blog post OpenCV OCR and text recognition with Tesseract.
Follow the instructions in the “How to install Tesseract 4” section of that tutorial, confirm your Tesseract install, and then come back here to learn how to detect and localize text with Tesseract.
Project structure
Go ahead and grab today’s .zip from the “Downloads” section of this blog post. Once you extract the files, you’ll be presented with an especially simple project layout:
% tree
.
├── apple_support.png
└── localize_text_tesseract.py

0 directories, 2 files
As you can see, we have only one Python script to review today — the localize_text_tesseract.py file.
Secondly, we have a single image to test our OCR script with. Feel free to grab other photos and graphics to test today’s code with as well!
Implementing text localization, text detection, and OCR with Tesseract
We are now ready to implement text detection and localization with Tesseract.
Open up a new file, name it localize_text_tesseract.py, and let’s get to work:
Review localize_text_tesseract.py
# import the necessary packages
from pytesseract import Output
import pytesseract
import argparse
import cv2

# construct the argument parser and parse the arguments
ap = argparse.ArgumentParser()
ap.add_argument("-i", "--image", required=True,
	help="path to input image to be OCR'd")
ap.add_argument("-c", "--min-conf", type=int, default=0,
	help="mininum confidence value to filter weak text detection")
args = vars(ap.parse_args())
We begin by importing packages, namely pytesseract and OpenCV. Be sure to refer to the “How to install pytesseract for Tesseract OCR” section above for installation links.
Next, we parse two command line arguments:
--image: The path to the input image upon which we will perform OCR--min-conf: In order to filter weak text detections, a minimum confidence threshold can be provided. By default, we’ve set the threshold to0so that all detections are returned
Let’s go ahead and run our input --image through pytesseract next:
# load the input image, convert it from BGR to RGB channel ordering,
# and use Tesseract to localize each area of text in the input image
image = cv2.imread(args["image"])
rgb = cv2.cvtColor(image, cv2.COLOR_BGR2RGB)
results = pytesseract.image_to_data(rgb, output_type=Output.DICT)
Lines 17 and 18 load the input --image and swap color channel ordering from BGR (OpenCV’s default) to RGB (compatible with Tesseract and pytesseract).
Then we detect and localize text using Tesseract and the image_to_data function (Line 19). This function returns results, which we’ll now post-process:
# loop over each of the individual text localizations
for i in range(0, len(results["text"])):
	# extract the bounding box coordinates of the text region from
	# the current result
	x = results["left"][i]
	y = results["top"][i]
	w = results["width"][i]
	h = results["height"][i]

	# extract the OCR text itself along with the confidence of the
	# text localization
	text = results["text"][i]
	conf = int(results["conf"][i])
Looping over the text localizations (Line 22), we begin by extracting the bounding box coordinates (Lines 25-28).
To grab the OCR’d text itself, we extract the information contained within the results dictionary using the "text" key and index (Line 32). This is the recognized text string.
Similarly, Line 33 extracts the confidence of the text localization (the confidence of the detected text).
From here, we’ll filter out weak detections and annotate our image:
# filter out weak confidence text localizations
	if conf > args["min_conf"]:
		# display the confidence and text to our terminal
		print("Confidence: {}".format(conf))
		print("Text: {}".format(text))
		print("")

		# strip out non-ASCII text so we can draw the text on the image
		# using OpenCV, then draw a bounding box around the text along
		# with the text itself
		text = "".join([c if ord(c) < 128 else "" for c in text]).strip()
		cv2.rectangle(image, (x, y), (x + w, y + h), (0, 255, 0), 2)
		cv2.putText(image, text, (x, y - 10), cv2.FONT_HERSHEY_SIMPLEX,
			1.2, (0, 0, 255), 3)

# show the output image
cv2.imshow("Image", image)
cv2.waitKey(0)
Comparing confidence versus our --min-conf command line argument ensures that the confidence is sufficiently high (Line 36).
In our terminal, we print information for debugging/informational purposes, including both the confidence and text itself (Lines 38-40).
OpenCV’s cv2.putText function doesn’t support non-ASCII characters, so we need to strip any non-ASCII characters out. This is handled by Line 45, where we work with character ordinals (ord(c)). Be sure to refer to this ASCII chart in Wikipedia as needed.
With the special characters eliminated from our text, now we’ll annotate the output image. Line 46 draws a bounding box around the detected text, and Lines 47 and 48 draw the text itself just above the bounding box region.
Finally, using OpenCV’s imshow function, we display the result on our screen (Line 51). In order to keep the GUI window on the screen longer than a few milliseconds, the cv2.waitKey(0) call locks the GUI window as visible until any key is pressed.
Great job performing OCR with Tesseract and pytesseract.
Tesseract text localization, text detection, and OCR results
We are now ready to perform text detection and localization with Tesseract!
Make sure you use the “Downloads” section of this tutorial to download the source code and example image.
From there, open up a terminal, and execute the following command:
$ python localize_text_tesseract.py --image apple_support.png
Confidence: 26
Text: a

Confidence: 96
Text: Apple

Confidence: 96
Text: Support

Confidence: 96

Here, you can see that Tesseract has detected all regions of text and OCR’d each text region. The results look good, but what is up with Tesseract thinking the leaf in the Apple logo is a 4?
If you look at our terminal output, you’ll see that particular text region has low confidence.
We can improve our Tesseract text detection results simply by supplying a --min-conf value:
$ python localize_text_tesseract.py --image apple_support.png --min-conf 50
Confidence: 96
Text: Apple

Confidence: 96
Text: Support

Confidence: 96
Text: 1-800-275-2273
Here, we are filtering out any text detections and OCR results that have a confidence <= 50, and as our results show, the low quality text region has been filtered out.
When developing your own text detection and OCR applications with Tesseract, consider using the image_to_data function — it’s super easy to use and makes text localization a breeze.
What’s next?
Today’s blog post was admittedly simple and straightforward, and my hope is that it gives you a little inspiration and confidence.
I’ll be blunt: Computer vision apps and services can be quite complex — much more so than today’s tutorial.
If you are interested in learning more about image processing, computer vision, and machine/deep learning, look no further than the PyImageSearch Gurus course and community.
Inside PyImageSearch Gurus, you’ll find:
- An actionable, real-world course on Computer Vision, Deep Learning, and OpenCV. Each lesson in PyImageSearch Gurus is taught in the same hands-on, easy-to-understand PyImageSearch style that you know and love
- The most comprehensive computer vision education online today. The PyImageSearch Gurus course covers 13 modules broken out into 168 lessons, with over 2,161 pages of content. You won’t find a more detailed computer vision course anywhere else online; I guarantee it
- A community of like-minded developers, researchers, and students just like you, who are eager to learn computer vision, level-up their skills, and collaborate on projects. I participate in the forums nearly every day. These forums are a great way to get expert advice, both from me as well as the more advanced students
Spend a moment reviewing these previous students’ success stories — each of these students invested in themselves and has achieved success. I have no doubt the same will be true for you once you enroll.
If you’d like more information, simply click here:
Summary
In this tutorial, you learned how to use Tesseract to detect text, localize it, and then OCR it.
The benefit of using Tesseract to perform text detection and OCR is that we can do so in just a single function call, making it easier than the multistage OpenCV OCR process.
That said, OCR is still an area of computer vision that is far from solved.
Whenever confronted with an OCR project, be sure to apply both methods and see which method gives you the best results — let your empirical results guide you.
To download the source code to this post (and be notified when future tutorials are published here on PyImageSearch), simply enter your email address in the form below!

Download the Source Code and FREE 17-page Resource Guide
Enter your email address below to get a .zip of the code and a FREE 17-page Resource Guide on Computer Vision, OpenCV, and Deep Learning. Inside you’ll find my hand-picked tutorials, books, courses, and libraries to help you master CV and DL!
The post Tesseract OCR: Text localization and detection appeared first on PyImageSearch.