In this tutorial, you will learn how to flip images using OpenCV and the cv2.flip function.
Similar to image rotation, OpenCV also provides methods to flip an image across its x- or y-axis. Though flipping operations are used less often, they are still very valuable to learn — and for reasons that you may not consider off the top of your head.
For example, let’s imagine working for a small startup company that wants to build a machine learning classifier to detect faces within images. We would need a dataset of example faces that our algorithm could use to “learn” what a face is. But unfortunately, the company has only provided us with a tiny dataset of 20 faces, and we don’t have the means to acquire more data.
So what do we do?
We apply flipping operations to augment our dataset!
We can horizontally flip each face image (since a face is still a face, whether mirrored or not) and use these mirrored versions as additional training data.
While this example sounds silly and contrived, it’s not. Powerful, data-hungry, deep learning algorithms purposely use flipping to generate extra data during training time (through a technique called data augmentation).
So, as you see, the image processing techniques you’re learning here really are the building blocks for larger computer vision systems!
To learn how to flip images with OpenCV and cv2.flip, just keep reading.
OpenCV Flip Image ( cv2.flip )
In the first part of this tutorial, we’ll discuss what image flipping is and how OpenCV can help us flip images.
From there, we’ll configure our development environment and review our project directory structure.
We’ll then implement a Python script to perform image flipping with OpenCV.
What is image flipping?
We can flip an image around either the x-axis, y-axis, or even both.
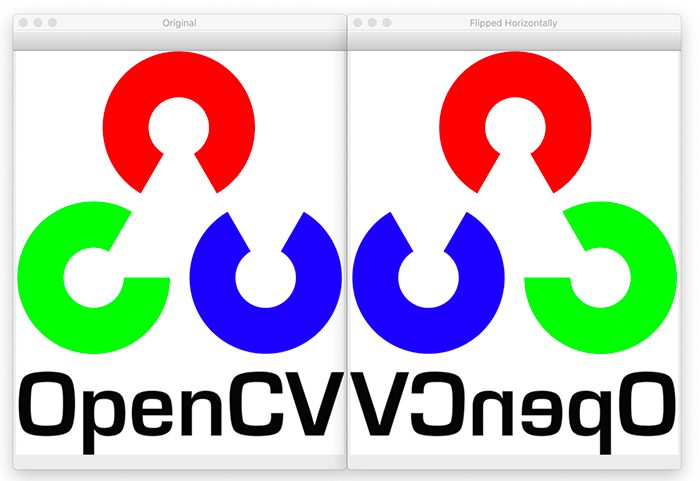
Flipping an image is better explained by viewing an image flip’s output before starting the code. Check out Figure 1 to see an image flipped horizontally:
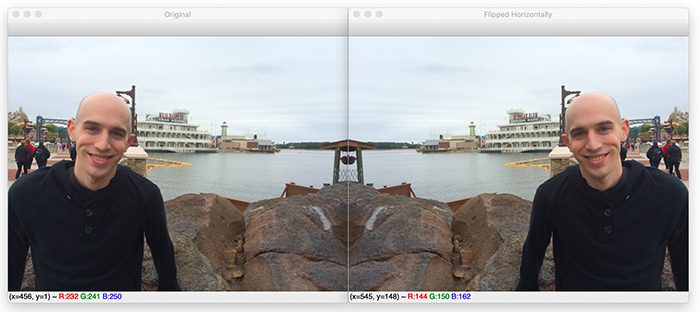
Notice how on the left, we have our original image, and on the right, the image has been mirrored horizontally.
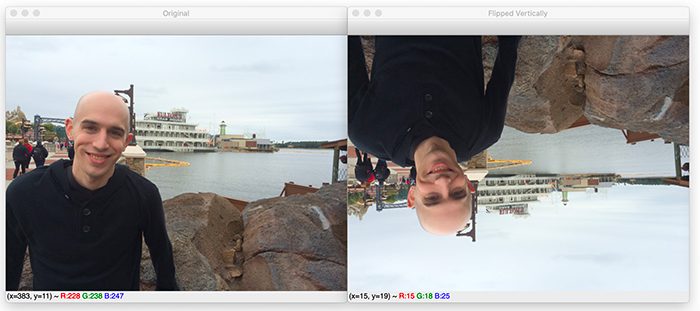
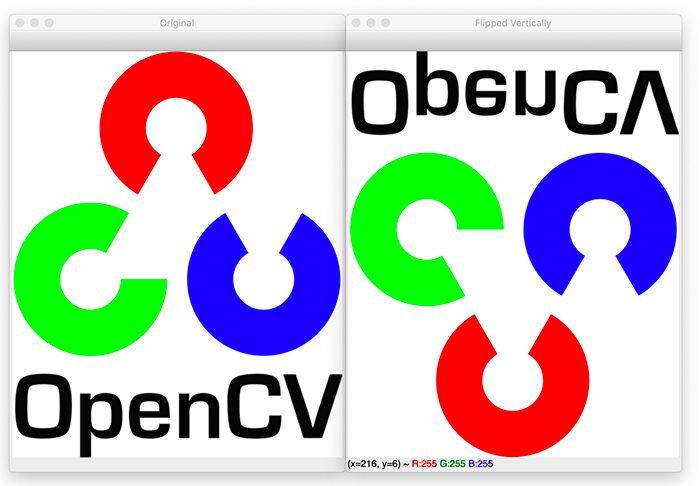
We can do the same vertically:
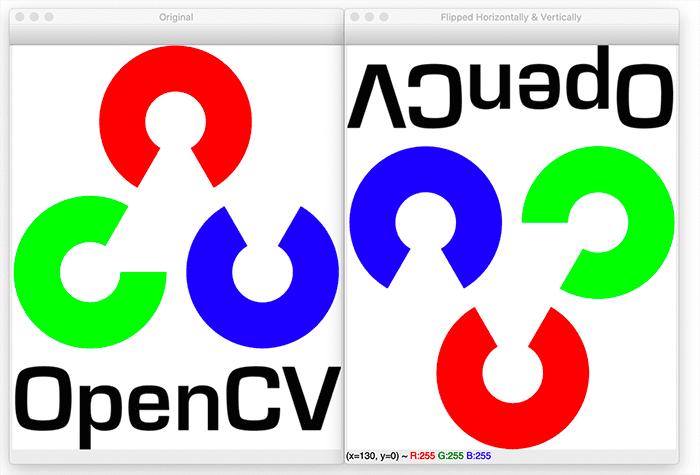
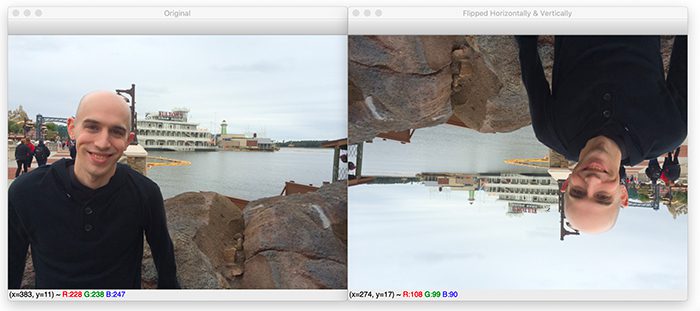
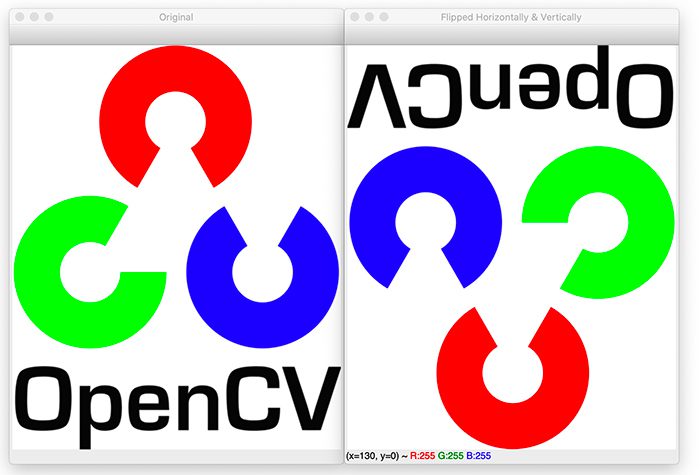
And we can combine horizontal and vertical flips as well:
Later in this tutorial, you’ll discover how to perform these image flipping operations with OpenCV.
Configuring your development environment
To follow this guide, you need to have the OpenCV library installed on your system.
Luckily, OpenCV is pip-installable:
$ pip install opencv-contrib-python
If you need help configuring your development environment for OpenCV, I highly recommend that you read my pip install OpenCV guide — it will have you up and running in a matter of minutes.
Having problems configuring your development environment?

All that said, are you:
- Short on time?
- Learning on your employer’s administratively locked system?
- Wanting to skip the hassle of fighting with the command line, package managers, and virtual environments?
- Ready to run the code right now on your Windows, macOS, or Linux systems?
Then join PyImageSearch Plus today!
Gain access to Jupyter Notebooks for this tutorial and other PyImageSearch guides that are pre-configured to run on Google Colab’s ecosystem right in your web browser! No installation required.
And best of all, these Jupyter Notebooks will run on Windows, macOS, and Linux!
Project structure
Before reviewing any code for clipping an image with OpenCV, let’s first review our project directory structure.
Be sure to access the “Downloads” section of this tutorial to retrieve the source code and example image.
From there, take a peek at your project folder:
$ tree . --dirsfirst
.
├── opencv_flip.py
└── opencv_logo.png

0 directories, 2 files
Our opencv_flip.py script will load the opencv_logo.png image from disk and then demonstrate how to use the cv2.flip function to flip an image.
Implementing image flipping with OpenCV
Next on our list of image transformations to explore is flipping. We can flip an image around either the x- or y-axis, or even both.
Flipping an image is better explained by viewing the output of an image flip, before we get into the code. Check out Figure 5 to see an image flipped horizontally:
Now that you see what an image flip looks like, we can explore the code:
# import the necessary packages
import argparse
import cv2

# construct the argument parser and parse the arguments
ap = argparse.ArgumentParser()
ap.add_argument("-i", "--image", type=str, default="opencv_logo.png",
	help="path to the input image")
args = vars(ap.parse_args())
Lines 2 and 3 import our required Python packages while Lines 6-9 parse our command line arguments.
We only need a single argument here, --image, which is the path to the input image we want to flip. We default this value to the opencv_logo.png image in our project directory.
Let’s now flip the image horizontally:
# load the original input image and display it to our screen
image = cv2.imread(args["image"])
cv2.imshow("Original", image)

# flip the image horizontally
print("[INFO] flipping image horizontally...")
flipped = cv2.flip(image, 1)
cv2.imshow("Flipped Horizontally", flipped)
We start on Lines 12 and 13 by loading our input image from disk and displaying it to our screen.
Flipping an image horizontally is accomplished by making a call to the cv2.flip function on Line 17, the output of which is seen in Figure 5.
The cv2.flip method requires two arguments: the image we want to flip and a specific code/flag used to determine how we flip the image.
Using a flip code value of 1 indicates that we flipped the image horizontally, around the y-axis (Line 17).
Specifying a flip code of 0 indicates that we want to flip the image vertically, around the x-axis:
# flip the image vertically
flipped = cv2.flip(image, 0)
print("[INFO] flipping image vertically...")
cv2.imshow("Flipped Vertically", flipped)
Figure 6 displays the output of flipping an image vertically:
Finally, using a negative flip code flips the image around both axes.
# flip the image along both axes
flipped = cv2.flip(image, -1)
print("[INFO] flipping image horizontally and vertically...")
cv2.imshow("Flipped Horizontally & Vertically", flipped)
cv2.waitKey(0)
Here, you can see that our image is flipped both horizontally and vertically:
Flipping an image is very simple — perhaps one of the most simple examples in this series!
OpenCV image flipping results
To flip images with OpenCV, be sure to access the “Downloads” section of this tutorial to retrieve the source code and example image.
From there, open a shell and execute the following command:
$ python opencv_flip.py
[INFO] flipping image horizontally...
[INFO] flipping image vertically...
[INFO] flipping image horizontally and vertically...
Your OpenCV flipping results should match mine from the previous section.
What’s next?

Would you like to learn how to successfully and confidently apply OpenCV to your projects?
Are you worried that configuring your development environment for Computer Vision, Deep Learning, and OpenCV will be too challenging, resulting in confusing, hard to debug error messages?
Concerned that you’ll get lost sifting through endless tutorials and video guides as you struggle to master Computer Vision?
No problem, because I’ve got you covered. PyImageSearch University is your chance to learn from me at your own pace.
You’ll find everything you need to master the basics (like we did together in this tutorial) and move on to advanced concepts.
Don’t worry about your operating system or development environment. I’ve got you covered with pre-configured Jupyter Notebooks in Google Colab for every tutorial on PyImageSearch, including Jupyter Notebooks for our new weekly tutorials as well!
Best of all, these Jupyter Notebooks will run on your machine, regardless of whether you are using Windows, macOS, or Linux! Irrespective of the operating system used, you will still be able to follow along and run the code in every lesson (all inside the convenience of your web browser).
Additionally, you can massively accelerate your progress by watching our video lessons accompanying each post. Every lesson in PyImageSearch University includes a detailed, step-by-step video guide.
You may feel that learning Computer Vision, Deep Learning, and OpenCV is too hard. Don’t worry; I’ll guide you gradually through each lecture and topic, so we build a solid foundation, and you grasp all the content.
When you think about it, PyImageSearch University is almost an unfair advantage compared to self-guided learning. You’ll learn more efficiently and master Computer Vision faster.
Oh, and did I mention you’ll also receive Certificates of Completion as you progress through each course at PyImageSearch University?
I’m sure PyImageSearch University will help you master OpenCV drawing and all the other computer vision skills you will need. Why not join today?
Summary
In this tutorial, you learned how to flip images horizontally and vertically with OpenCV and the cv2.flip function.
Admittedly, image flipping is one of the easiest image processing concepts we have covered. However, just because a concept is simple does not mean that it’s not used for more powerful purposes.
As I mentioned in the introduction to this tutorial, flipping is consistently used in machine learning/deep learning to generate more training data samples, thus creating more powerful and robust image classifiers.
To download the source code to this post (and be notified when future tutorials are published here on PyImageSearch), simply enter your email address in the form below!

Download the Source Code and FREE 17-page Resource Guide
Enter your email address below to get a .zip of the code and a FREE 17-page Resource Guide on Computer Vision, OpenCV, and Deep Learning. Inside you'll find my hand-picked tutorials, books, courses, and libraries to help you master CV and DL!
The post OpenCV Flip Image ( cv2.flip ) appeared first on PyImageSearch.