In this tutorial you will learn how to perform real-time augmented reality in video streams using OpenCV.

Last week we covered the basics of augmented reality with OpenCV; however, that tutorial only focused on applying augmented reality to images.
That raises the question:
“Is it possible to perform real-time augmented reality in real-time video with OpenCV?”
It absolutely is — and the rest of this tutorial will show you how.
To learn how to perform real-time augmented reality with OpenCV, just keep reading.
OpenCV: Real-time video augmented reality
In the first part of this tutorial, you will learn how OpenCV can facilitate augmented reality in video streams in real time.
From there, we’ll configure our development environment and review our project directory structure.
We’ll then review two Python scripts:
- The first one will contain a helper function,
find_and_warp, which will accept an input image, detect augmented reality markers, and then warp a source image onto the input. - The second script will act as a driver script and utilize our
find_and_warp
We’ll wrap up the tutorial with a discussion of our real-time augmented reality results.
Let’s get started!
How can we apply augmented reality to real-time video streams with OpenCV?

The very reason the OpenCV library exists is to facilitate real-time image processing. The library accepts input images/frames, processes them as quickly as possible, and then returns the results.
Since OpenCV is geared to work with real-time image processing, we can also use OpenCV to facilitate real-time augmented reality.
For the purposes of this tutorial we will:
- Access our video stream
- Detect ArUco markers in each input frame
- Take a source image and apply a perspective transform to map the source input onto the frame, thus creating our augmented reality output!
And just to make this project even more fun and interesting, we’ll utilize two video streams:
- The first video stream will act as our “eyes” into the real world (i.e., what our camera sees).
- We’ll then read frames from the second video stream and then transform them into the first.
By the end of this tutorial, you will have a fully functional OpenCV augmented reality project running in real time!
Configuring your development environment
In order to perform real-time augmented reality with OpenCV, you need to have the OpenCV library installed.
Luckily, OpenCV is pip-installable:
$ pip install opencv-contrib-python
If you need help configuring your development environment for OpenCV, I highly recommend that you read my pip install OpenCV guide — it will have you up and running in a matter of minutes.
Having problems configuring your development environment?

All that said, are you:
- Short on time?
- Learning on your employer’s administratively locked system?
- Wanting to skip the hassle of fighting with the command line, package managers, and virtual environments?
- Ready to run the code right now on your Windows, macOS, or Linux system?
Then join PyImageSearch Plus today!
Gain access to Jupyter Notebooks for this tutorial and other PyImageSearch guides that are pre-configured to run on Google Colab’s ecosystem right in your web browser! No installation required.
And best of all, these Jupyter Notebooks will run on Windows, macOS, and Linux!
Project structure
Before we can implement real-time augmented reality with OpenCV, we first need to review our project directory structure.
Start by using the “Downloads” section of this tutorial to download the source code and example video files.
Let’s now take a peek at the directory contents:
$ tree . --dirsfirst
.
├── pyimagesearch
│   ├── __init__.py
│   └── augmented_reality.py
├── videos
│   └── jp_trailer_short.mp4
├── markers.pdf
└── opencv_ar_video.py

2 directories, 4 files
Inside the pyimagesearch module you’ll see that we have a Python file named augmented_reality.py. This file contains a function named find_and_warp.
The find_and_warp function encapsulates the logic used in our previous tutorial on OpenCV Augmented Reality and allows us to:
- Detect ArUco tags in our Pantone color match card
- Transform an input frame onto the match card surface
- Return the output augmented reality image to the calling function
The output of which will look something like this:
If you don’t have your own color match card, don’t worry! Inside our project directory structure, you’ll see that I’ve included markers.pdf, which is a scan of my own Pantone color match card:
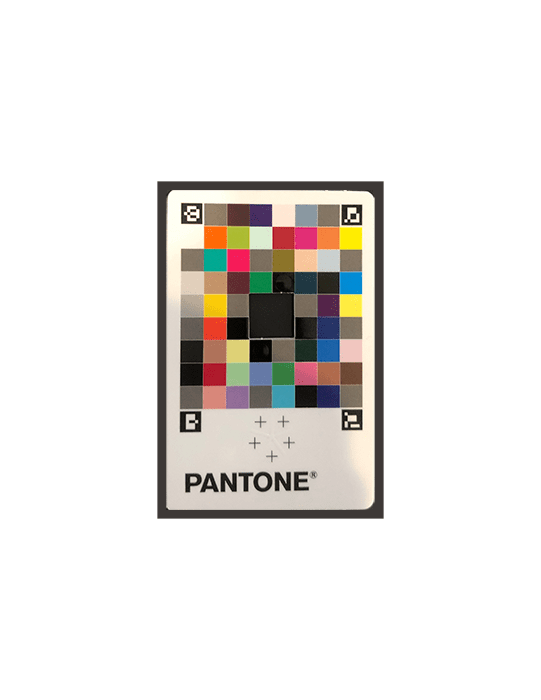
While it won’t help you perform color matching, you can still use it for the purposes of this example (i.e., detecting ArUco markers on it and then transforming the source image onto the frame). Simply print markers.pdf on a piece of paper, cut it out, and then place it in view of your camera. From there you’ll be able to follow along.
Finally, opencv_ar_video.py includes all logic required to implement augmented reality in real time with OpenCV.
Implementing our marker detector/augmented reality utility function
Before we can implement augmented reality with OpenCV in real-time video streams, we first need to create a helper function, find_and_warp, which as the name suggests, will:
- Accept an input image and source image
- Find the four ArUco tags on the input image
- Construct and apply a homography matrix to warp the source image into the input surface
Additionally, we’ll include logic to handle when all four ArUco reference points are not detected (and how to ensure there is no flickering/choppiness in our output).
Open up the augmented_reality.pypyimagesearch module of our project directory structure, and let’s get to work:
# import the necessary packages
import numpy as np
import cv2

# initialize our cached reference points
CACHED_REF_PTS = None
Our imports are taken care of on Lines 2 and 3. We need only two, NumPy for numerical array processing and cv2 for our OpenCV bindings.
We then initialize a global variable, CACHED_REF_POINTS, which is our cached reference points (i.e., location of ArUco tag markers in the previous frames).
Due to changes in lighting conditions, viewpoint, or motion blur, there will be times when our four reference ArUco markers cannot be detected in a given input frame.
When that happens we have two courses of action:
- Return from the function with empty output. The benefit to this approach is that it’s simple and easy to implement (and also logically sound). The problem is that it creates a “flickering” effect if the ArUco tags are found in frame #1, missed in #2, and then found again in frame #3.
- Fall back on the previous known location of ArUco markers. This is the caching method. It reduces flickering and helps create a seamless augmented reality experience, but if the reference markers move quickly, then the effects may appear a bit “laggy.”
Which approach you decide to use is totally up to you, but I personally like the caching method, as it creates a better user experience for augmented reality.
With our imports and variable initializations taken care of, let’s move on to our find_and_warp
def find_and_warp(frame, source, cornerIDs, arucoDict, arucoParams,
	useCache=False):
	# grab a reference to our cached reference points
	global CACHED_REF_PTS

	# grab the width and height of the frame and source image,
	# respectively
	(imgH, imgW) = frame.shape[:2]
	(srcH, srcW) = source.shape[:2]
This function is responsible for accepting an input source and frame, finding the ArUco markers on the frame, and then constructing and applying a perspective warp to transform the source onto the frame.
This function accepts six arguments:
frame: The input frame from our video streamsourcecornerIDsarucoDictarucoParamsuseCache
We then grab the width and height of both our framesource
Let’s now detect ArUco markers in our frame:
	# detect AruCo markers in the input frame
	(corners, ids, rejected) = cv2.aruco.detectMarkers(
		frame, arucoDict, parameters=arucoParams)

	# if we *did not* find our four ArUco markers, initialize an
	# empty IDs list, otherwise flatten the ID list
	ids = np.array([]) if len(corners) != 4 else ids.flatten()

	# initialize our list of reference points
	refPts = []
Lines 19 and 20 make a call to cv2.aruco.detectMarkers to detect ArUco markers in the input frame.
Line 24 initializes a list of ids. If we found four corners, then our ids list is a 1-d NumPy array of the ArUco markers detected. Otherwise, we set ids to an empty array.
Line 27 initializes our list of reference points (refPts), which correspond to the four detected ArUco markers.
We can now loop over our cornerIDs:
	# loop over the IDs of the ArUco markers in top-left, top-right,
	# bottom-right, and bottom-left order
	for i in cornerIDs:
		# grab the index of the corner with the current ID
		j = np.squeeze(np.where(ids == i))

		# if we receive an empty list instead of an integer index,
		# then we could not find the marker with the current ID
		if j.size == 0:
			continue

		# otherwise, append the corner (x, y)-coordinates to our list
		# of reference points
		corner = np.squeeze(corners[j])
		refPts.append(corner)
Line 33 finds the index, ji.
If no such marker exists for the current marker ID, i, then we continue looping (Lines 37 and 38).
Otherwise, we add the corner (x, y)-coordinates to our reference list (Lines 42 and 43).
But what happens if we could not find all four reference points? What happens then?
The next code block addresses that question:
	# check to see if we failed to find the four ArUco markers
	if len(refPts) != 4:
		# if we are allowed to use cached reference points, fall
		# back on them
		if useCache and CACHED_REF_PTS is not None:
			refPts = CACHED_REF_PTS

		# otherwise, we cannot use the cache and/or there are no
		# previous cached reference points, so return early
		else:
			return None

	# if we are allowed to use cached reference points, then update
	# the cache with the current set
	if useCache:
		CACHED_REF_PTS = refPts
Line 46 makes a check to see if we failed to detect all four ArUco markers. When that happens we have two choices:
- Fall back on the cache and use our
CACHED_REF_PTS(Lines 49 and 50) - Simply return
None
Provided we are using the reference point cache, we update our CACHED_REF_PTSrefPts.
Given our refPts
	# unpack our ArUco reference points and use the reference points
	# to define the *destination* transform matrix, making sure the
	# points are specified in top-left, top-right, bottom-right, and
	# bottom-left order
	(refPtTL, refPtTR, refPtBR, refPtBL) = refPts
	dstMat = [refPtTL[0], refPtTR[1], refPtBR[2], refPtBL[3]]
	dstMat = np.array(dstMat)

	# define the transform matrix for the *source* image in top-left,
	# top-right, bottom-right, and bottom-left order
	srcMat = np.array([[0, 0], [srcW, 0], [srcW, srcH], [0, srcH]])

	# compute the homography matrix and then warp the source image to
	# the destination based on the homography
	(H, _) = cv2.findHomography(srcMat, dstMat)
	warped = cv2.warpPerspective(source, H, (imgW, imgH))
The code above, as well as in the remainder of this function, is essentially identical to that of last week, so I will defer a detailed discussion of these code blocks to the previous guide.
Lines 66-68 construct our destination matrix (i.e., where the sourceframe), while Line 72 creates the source matrix, which is simply the top-left, top-right, bottom-right, and bottom-left corners of the source image.
Line 76 computes our homography matrix from the two matrices. This homography matrix is used on Line 77 to construct the warped
From there we need to prepare a mask that will allow us to seamlessly apply the warped image to the frame:
	# construct a mask for the source image now that the perspective
	# warp has taken place (we'll need this mask to copy the source
	# image into the destination)
	mask = np.zeros((imgH, imgW), dtype="uint8")
	cv2.fillConvexPoly(mask, dstMat.astype("int32"), (255, 255, 255),
		cv2.LINE_AA)

	# this step is optional, but to give the source image a black
	# border surrounding it when applied to the source image, you
	# can apply a dilation operation
	rect = cv2.getStructuringElement(cv2.MORPH_RECT, (3, 3))
	mask = cv2.dilate(mask, rect, iterations=2)

	# create a three channel version of the mask by stacking it
	# depth-wise, such that we can copy the warped source image
	# into the input image
	maskScaled = mask.copy() / 255.0
	maskScaled = np.dstack([maskScaled] * 3)
Lines 82-84 allocate memory for a mask
A dilation operation is performed on Lines 89 and 90 to create a black border surrounding the source image (optional, but looks good for aesthetic purposes).
We then scale our mask from the range [0, 255] to [0, 1] and then stack it depth-wise, resulting in a 3-channel mask.
The final step is to use the mask to apply the warped image to the input surface:
	# copy the warped source image into the input image by
	# (1) multiplying the warped image and masked together,
	# (2) then multiplying the original input image with the
	# mask (giving more weight to the input where there
	# *ARE NOT* masked pixels), and (3) adding the resulting
	# multiplications together
	warpedMultiplied = cv2.multiply(warped.astype("float"),
		maskScaled)
	imageMultiplied = cv2.multiply(frame.astype(float),
		1.0 - maskScaled)
	output = cv2.add(warpedMultiplied, imageMultiplied)
	output = output.astype("uint8")

	# return the output frame to the calling function
	return output
Lines 104-109 copy the warpedframe, which we then return to the calling function on Line 112.
For a more detailed review of the actual homography matrix construction, warp transform, and post-processing tasks, refer to last week’s guide.
Creating our OpenCV video augmented reality driver script
With our find_and_warpopencv_ar_video.py
Let’s open up the opencv_ar_video.py
# import the necessary packages
from pyimagesearch.augmented_reality import find_and_warp
from imutils.video import VideoStream
from collections import deque
import argparse
import imutils
import time
import cv2
Lines 2-8 handle importing our required Python packages. Notable imports include:
find_and_warpVideoStreamdeque
Let’s now parse our command line arguments:
# construct the argument parser and parse the arguments
ap = argparse.ArgumentParser()
ap.add_argument("-i", "--input", type=str, required=True,
	help="path to input video file for augmented reality")
ap.add_argument("-c", "--cache", type=int, default=-1,
	help="whether or not to use reference points cache")
args = vars(ap.parse_args())
Our script accepts two command line arguments, one of which is required and the other optional:
--input--cache
Moving on, let’s now prepare our ArUco marker detector and video pointers:
# load the ArUCo dictionary and grab the ArUCo parameters
print("[INFO] initializing marker detector...")
arucoDict = cv2.aruco.Dictionary_get(cv2.aruco.DICT_ARUCO_ORIGINAL)
arucoParams = cv2.aruco.DetectorParameters_create()

# initialize the video file stream
print("[INFO] accessing video stream...")
vf = cv2.VideoCapture(args["input"])

# initialize a queue to maintain the next frame from the video stream
Q = deque(maxlen=128)

# we need to have a frame in our queue to start our augmented reality
# pipeline, so read the next frame from our video file source and add
# it to our queue
(grabbed, source) = vf.read()
Q.appendleft(source)

# initialize the video stream and allow the camera sensor to warm up
print("[INFO] starting video stream...")
vs = VideoStream(src=0).start()
time.sleep(2.0)
Lines 20 and 21 initialize our ArUco tag dictionary and detector parameters. The ArUco tags used on our input surface are DICT_ARUCO_ORIGINAL
Line 25 opens our --inputQ, a FIFO (First In, First Out) deque data structure used to store frames read from our vf file pointer. We use a queue here to improve file I/O latency by ensuring a source frame is (nearly) always ready for the augmented reality transform.
Later in this script we’ll make the assumption that our Q is populated, so we read an initial source from the vf and then update our Q (Lines 33 and 34).
Lines 38 and 39 then initialize our webcam video stream and allow the camera sensor to warm up.
Our next code block starts a while loop that will continue until our Q is empty (implying that the input video file ran out of frames and has reached the end of the file):
# loop over the frames from the video stream
while len(Q) > 0:
	# grab the frame from our video stream and resize it
	frame = vs.read()
	frame = imutils.resize(frame, width=600)

	# attempt to find the ArUCo markers in the frame, and provided
	# they are found, take the current source image and warp it onto
	# input frame using our augmented reality technique
	warped = find_and_warp(
		frame, source,
		cornerIDs=(923, 1001, 241, 1007),
		arucoDict=arucoDict,
		arucoParams=arucoParams,
		useCache=args["cache"] > 0)
Lines 44 and 45 read a frame
We then apply our find_and_warp
- Detect the ArUco markers on input
frame - Construct a homography matrix to map the
sourceto theframe - Apply the perspective warp
- Return the final
warpedimage to the calling function
Take special note of the cornerIDs and useCache parameters.
The cornerIDs were obtained from our previous series of tutorials on ArUco markers, where we were tasked with detecting and identifying each of the four ArUco markers in our input image. If you are using your own custom ArUco marker, then you’ll likely need to update the cornerIDs, accordingly.
Secondly, the useCache parameter controls whether or not we are utilizing reference point caching (controlled via the --cache command line argument). Play with this parameter, and explore what happens when caching is turned on versus off.
Our next code block handles updating our queue data structure:
	# if the warped frame is not None, then we know (1) we found the
	# four ArUCo markers and (2) the perspective warp was successfully
	# applied
	if warped is not None:
		# set the frame to the output augment reality frame and then
		# grab the next video file frame from our queue
		frame = warped
		source = Q.popleft()

	# for speed/efficiency, we can use a queue to keep the next video
	# frame queue ready for us -- the trick is to ensure the queue is
	# always (or nearly full)
	if len(Q) != Q.maxlen:
		# read the next frame from the video file stream
		(grabbed, nextFrame) = vf.read()

		# if the frame was read (meaning we are not at the end of the
		# video file stream), add the frame to our queue
		if grabbed:
			Q.append(nextFrame)
Lines 60-64 handle the case where our perspective warp was successful. In this case, we update our frame to be the warpedsource frame from our queue.
Lines 69-76 attempt to ensure our queue data structure is filled. If we haven’t reached the maximum length of the QnextFrame
Our final code block handles displaying our output frame:
	# show the output frame
	cv2.imshow("Frame", frame)
	key = cv2.waitKey(1) & 0xFF

	# if the `q` key was pressed, break from the loop
	if key == ord("q"):
		break

# do a bit of cleanup
cv2.destroyAllWindows()
vs.stop()
Our real-time augmented reality script will continue to execute until either:
- We press the
q - The source
--inputvideo file runs out of frames
Take a second to congratulate yourself on implementing real-time augmented reality with OpenCV!
Augmented reality in real-time video streams with OpenCV
Ready to perform augmented reality in real-time video streams with OpenCV?
Start by using the “Downloads” section of this tutorial to download the source code and example video.
From there, open up a terminal, and execute the following command:
$ python opencv_ar_video.py --input videos/jp_trailer_short.mp4
[INFO] initializing marker detector...
[INFO] accessing video stream...
[INFO] starting video stream...
As you can see from my output, we are:
- Reading frames from both my camera sensor as well as the Jurassic Park trailer video residing on disk
- Detecting the ArUco tags on the card
- Applying a perspective warp to transform the video frame from the Jurassic Park trailer onto the real-world environment captured by my camera
Furthermore, note that our augmented reality application is running in real time!
However, there is a bit of an issue …
Notice there is considerable flickering that appears in the output frames — why is that?
The reason is that the ArUco marker detection is not fully “stable.” In some frames all four markers are detected and in others they are not.
An ideal solution would be to ensure all four markers are always detected, but that can’t be guaranteed in every scenario.
Instead, what we can do is fall back on reference point caching:
$ python opencv_ar_video.py --input videos/jp_trailer_short.mp4 --cache 1
[INFO] initializing marker detector...
[INFO] accessing video stream...
[INFO] starting video stream...
Using reference point caching you can now see that our results are a bit better. When the four ArUco markers are not detected in the current frame, we fall back to their location in the previous frame where all four were detected.
Another potential solution is to utilize optical flow to help aid in reference point tracking (but that topic is outside the scope of this tutorial).
What’s next?

Performing real-time augmented reality in video streams using OpenCV is a technique that could give you the edge in your AI career. But, if you’re relatively new to OpenCV and computer vision, you must understand the fundamentals before you move on to advanced projects.
I learned computer vision the hard way, wading through textbooks, research papers, and continuously asking my advisor questions. There weren’t any blogs like PyImageSearch online back then and no courses that taught computer vision systematically using practical cases and examples.
That’s why I created PyImageSearch Gurus. This is the course I wish I’d had back in college!
PyImageSearch Gurus is the most comprehensive computer vision education available online today. All the content is highly actionable. You learn concepts and code through practical application and hands-on experience — and you’re also getting access to a highly engaged community of students who are learning and sharing along with you.
Join the PyImageSearch Gurus course and community and get:
- Everything you need to know about computer vision. I guarantee you won’t find a more detailed computer vision course anywhere else online.
- Hands-on, easy-to-understand lessons. All the content is highly actionable so you can apply it straight away in the real-world. And it’s delivered in the same direct PyImageSearch Style you know and love from these blog posts.
- Membership of a community where you can get expert advice. The PyImageSearch Gurus forums are full of developers, researchers, and students just like you who are eager to learn computer vision, level-up their skills, and collaborate on projects. They’re always happy to answer your questions, and I’m in there nearly every day too.
And if you’d like to take a look at the content first, grab the course syllabus and 10 free sample lessons right here.
Summary
In this tutorial you learned how to perform real-time augmented reality with OpenCV.
Using OpenCV, we were able to access our webcam, detect ArUco tags, and then transform an input image/frame into our scene, all while running in real time!
However, one of the biggest drawbacks to this augmented reality approach is that it requires we use markers/fiducials, such as ArUco tags, AprilTags, etc.
There is an active area of augmented reality research called markerless augmented reality.
With markerless augmented reality we do not need prior knowledge of the real-world environment, such as specific markers or objects that have to reside in our video stream.
Markerless augmented reality makes for much more beautiful, immersive experiences; however, most markerless augmented reality systems require flat textures/regions in order to work.
And furthermore, markerless augmented reality requires significantly more complex and computationally expensive algorithms.
We’ll cover markerless augmented reality in a future set of tutorials on the PyImageSearch blog.
To download the source code to this post (and be notified when future tutorials are published here on PyImageSearch), simply enter your email address in the form below!

Download the Source Code and FREE 17-page Resource Guide
Enter your email address below to get a .zip of the code and a FREE 17-page Resource Guide on Computer Vision, OpenCV, and Deep Learning. Inside you'll find my hand-picked tutorials, books, courses, and libraries to help you master CV and DL!
The post OpenCV Video Augmented Reality appeared first on PyImageSearch.